Welcome to the Life is Strange Optional Photos locations guide that helps you find the total of 50 Optional Photos locations for the five episodes of the PS3, PS4, Xbox 360, Xbox One & PC graphic adventure game.
The Timeline for all these in-game Optional Photos locations is listed below.
Table of Contents
- Episode 1: Chrysalis Optional Photos
- Episode 2: Out of Time Optional Photos
- Episode 3: Chaos Theory Optional Photos
- Episode 4: Dark Room Optional Photos
- Episode 5: Polarized Optional Photos
Index of Life is Strange Guides:
- This Page: Life is Strange Optional Photos Locations Guide
- Next Page: Life is Strange Episode 5 Walkthrough
- Next Page: Life is Strange Episode 4 Walkthrough
- Next Page: Life is Strange Episode 3 Walkthrough
- Next Page: Life is Strange Episode 2 Walkthrough
- Next Page: Life is Strange Episode 1 Walkthrough
- Next Page: Life is Strange Achievements Guide
- Next Page: Life is Strange Trophies Guide
- Next Page: Life is Strange Cheats
Life is Strange Optional Photos
How to find missing Optional Photos?: There are a total of 10 Optional Photos that you will need to find in each Episode. You can go to the “Play Episodes” menu and select specific parts of the Episode in order to find the missing optional photos. There is also a counter on this screen to help you figure it out.
Does the game save each Optional Photos you collect?: Yes, the game will automatically save the Optional Photos you just collected, so you don’t have to play to the end of the chapter. After taking each photograph you can safely quit the section you’re in without losing collectibles progress.
Finding all 50 Optional Photo locations and picking them up will help unlock the following Achievements / Trophies:
* “Macro Eyes” (10 Gamerscore / Bronze Trophy) — Take optional photo #1 in Episode 1: Chrysalis.
* “Wide Angles” (10 Gamerscore / Bronze Trophy) — Take optional photo #2 in Episode 1: Chrysalis.
* “Telephotogenic” (10 Gamerscore / Bronze Trophy) — Take optional photo #3 in Episode 1: Chrysalis.
* “Close-Ups” (10 Gamerscore / Bronze Trophy) — Take optional photo #4 in Episode 1: Chrysalis.
* “Red Eye” (10 Gamerscore / Bronze Trophy) — Take optional photo #5 in Episode 1: Chrysalis.
* “Focused” (10 Gamerscore / Bronze Trophy) — Take optional photo #6 in Episode 1: Chrysalis.
* “Zoomed In” (10 Gamerscore / Bronze Trophy) — Take optional photo #7 in Episode 1: Chrysalis.
* “Focal Pointed” (10 Gamerscore / Bronze Trophy) — Take optional photo #8 in Episode 1: Chrysalis.
* “Maximum Aperture” (10 Gamerscore / Bronze Trophy) — Take optional photo #9 in Episode 1: Chrysalis.
* “Light Leak” (10 Gamerscore / Bronze Trophy) — Take optional photo #10 in Episode 1: Chrysalis.
* “Visionary” (45 Gamerscore / Bronze Trophy) — Take all optional photos in Episode 1: Chrysalis.
* “Field Of View” (10 Gamerscore / Bronze Trophy) — Take optional photo #1 in Episode 2: Out of Time.
* “Full Exposure” (10 Gamerscore / Bronze Trophy) — Take optional photo #2 in Episode 2: Out of Time.
* “Processor” (10 Gamerscore / Bronze Trophy) — Take optional photo #3 in Episode 2: Out of Time.
* “Image Stabilizer” (10 Gamerscore / Bronze Trophy) — Take optional photo #4 in Episode 2: Out of Time.
* “Compressed” (10 Gamerscore / Bronze Trophy) — Take optional photo #5 in Episode 2: Out of Time.
* “Pixelated” (10 Gamerscore / Bronze Trophy) — Take optional photo #6 in Episode 2: Out of Time.
* “Dynamic Range” (10 Gamerscore / Bronze Trophy) — Take optional photo #7 in Episode 2: Out of Time.
* “Colorized” (10 Gamerscore / Bronze Trophy) — Take optional photo #8 in Episode 2: Out of Time.
* “Meter Made” (10 Gamerscore / Bronze Trophy) — Take optional photo #9 in Episode 2: Out of Time.
* “Resolution Revolution” (10 Gamerscore / Bronze Trophy) — Take optional photo #10 in Episode 2: Out of Time.
* “Lab Master” (45 Gamerscore / Bronze Trophy) — Take all optional photos in Episode 2: Out of Time.
* “Parallax View” (10 Gamerscore / Bronze Trophy) — Take optional photo #1 in Episode 3: Chaos Theory.
* “Lenscrafted” (10 Gamerscore / Bronze Trophy) — Take optional photo #2 in Episode 3: Chaos Theory.
* “The Reflex” (10 Gamerscore / Bronze Trophy) — Take optional photo #3 in Episode 3: Chaos Theory.
* “Histogrammar” (10 Gamerscore / Bronze Trophy) — Take optional photo #4 in Episode 3: Chaos Theory.
* “Bokeh” (10 Gamerscore / Bronze Trophy) — Take optional photo #5 in Episode 3: Chaos Theory.
* “Pinholed” (10 Gamerscore / Bronze Trophy) — Take optional photo #6 in Episode 3: Chaos Theory.
* “RAW Strength” (10 Gamerscore / Bronze Trophy) — Take optional photo #7 in Episode 3: Chaos Theory.
* “Viewfinder” (10 Gamerscore / Bronze Trophy) — Take optional photo #8 in Episode 3: Chaos Theory.
* “Optican” (10 Gamerscore / Bronze Trophy) — Take optional photo #9 in Episode 3: Chaos Theory.
* “Flash!” (10 Gamerscore / Bronze Trophy) — Take optional photo #10 in Episode 3: Chaos Theory.
* “Camera Eye” (45 Gamerscore / Bronze Trophy) — Take all optional photos in Episode 3: Chaos Theory.
* “Ambient” (10 Gamerscore / Bronze Trophy) — Take optional photo #1 in Episode 4: Dark Room.
* “Time-Lapsed” (10 Gamerscore / Bronze Trophy) — Take optional photo #2 in Episode 4: Dark Room.
* “Balance” (10 Gamerscore / Bronze Trophy) — Take optional photo #3 in Episode 4: Dark Room.
* “Rangefinder” (10 Gamerscore / Bronze Trophy) — Take optional photo #4 in Episode 4: Dark Room.
* “Gamma Value” (10 Gamerscore / Bronze Trophy) — Take optional photo #5 in Episode 4: Dark Room.
* “Dioptic Power” (10 Gamerscore / Bronze Trophy) — Take optional photo #6 in Episode 4: Dark Room.
* “Fisheye” (10 Gamerscore / Bronze Trophy) — Take optional photo #7 in Episode 4: Dark Room.
* “Manually Exposed” (10 Gamerscore / Bronze Trophy) — Take optional photo #8 in Episode 4: Dark Room.
* “Slideshow” (10 Gamerscore / Bronze Trophy) — Take optional photo #9 in Episode 4: Dark Room.
* “Tripod” (10 Gamerscore / Bronze Trophy) — Take optional photo #10 in Episode 4: Dark Room.
* “Shutterbug” (45 Gamerscore / Bronze Trophy) — Take all optional photos in Episode 4: Dark Room.
* “Incandescent” (10 Gamerscore / Bronze Trophy) — Take optional photo #1 in Episode 5: Polarized.
* “Night Vision” (10 Gamerscore / Bronze Trophy) — Take optional photo #2 in Episode 5: Polarized.
* “Framed” (10 Gamerscore / Bronze Trophy) — Take optional photo #3 in Episode 5: Polarized.
* “Camera Obscura” (10 Gamerscore / Bronze Trophy) — Take optional photo #4 in Episode 5: Polarized.
* “Blowup” (10 Gamerscore / Bronze Trophy) — Take optional photo #5 in Episode 5: Polarized.
* “Iris” (10 Gamerscore / Bronze Trophy) — Take optional photo #6 in Episode 5: Polarized.
* “Sensor” (10 Gamerscore / Bronze Trophy) — Take optional photo #7 in Episode 5: Polarized.
* “On Display” (10 Gamerscore / Bronze Trophy) — Take optional photo #8 in Episode 5: Polarized.
* “Light Meter” (10 Gamerscore / Bronze Trophy) — Take optional photo #9 in Episode 5: Polarized.
* “Silhouettes” (10 Gamerscore / Bronze Trophy) — Take optional photo #10 in Episode 5: Polarized.
* “Selfie Awareness” (45 Gamerscore / Bronze Trophy) — Take all optional photos in Episode 5: Polarized.
Episode 1: Chrysalis Optional Photos
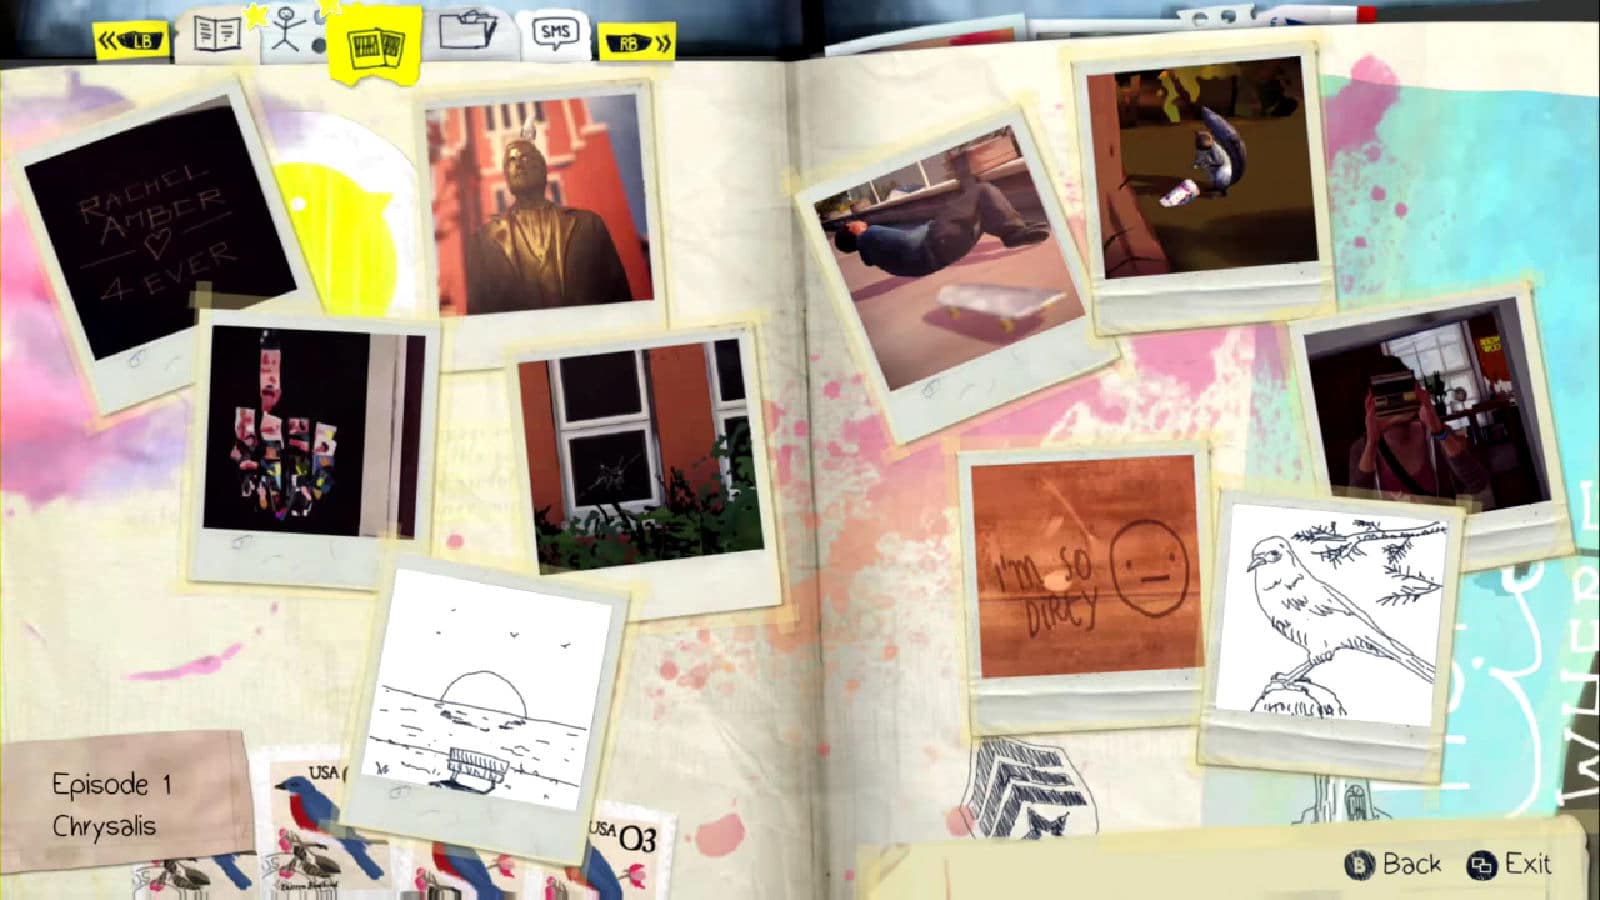
Here’s a picture showing all the extra photo locations in Episode 1. Click to enlarge:
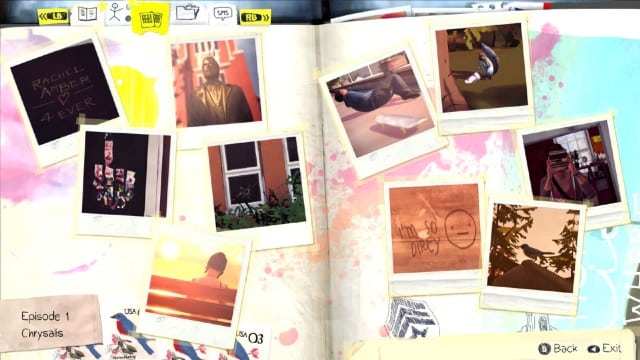
Where to find all Optional Photos in Life is Strange? The in-game collectibles locations for the Optional Photos are described in this detailed video guide with handy voice-over tips by Maka.
The 10 Optional Photos are listed in the “Episode 1: Chrysalis” video in the order that they appear chronologically.
Timeline in minutes for the Optional Photos Locations Guide:
• [0:17] – Optional Photo Location #1
• [0:39] – Optional Photo Location #2
• [1:04] – Optional Photo Location #3
• [2:06] – Optional Photo Location #4
• [2:36] – Optional Photo Location #5
• [3:00] – Optional Photo Location #6
• [3:42] – Optional Photo Location #7
• [4:26] – Optional Photo Location #8
• [5:15] – Optional Photo Location #9
• [5:43] – Optional Photo Location #10
Episode 2: Out of Time Optional Photos
Here’s a picture showing all the extra photo locations in Episode 2. Click to enlarge:
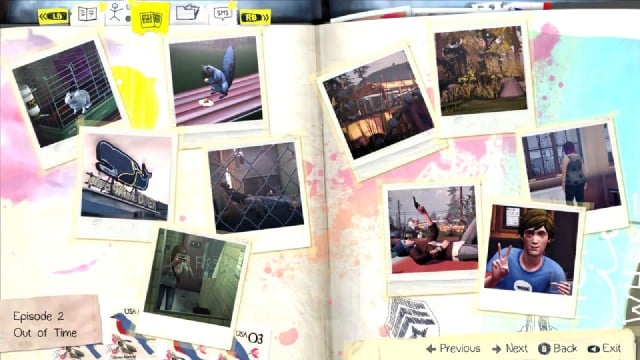
All 10 Life is Strange “Episode 2: Out of Time” Optional Photos get found in this video guide with detailed location tips.
Timeline in minutes for the Optional Photos Locations Guide:
• [0:15] – Optional Photo #11
• [0:44] – Optional Photo #12
• [1:55] – Optional Photo #13
• [2:26] – Optional Photo #14
• [3:13] – Optional Photo #15
• [3:48] – Optional Photo #16
• [4:19] – Optional Photo #17
• [5:19] – Optional Photo #18
• [5:57] – Optional Photo #19
• [7:42] – Optional Photo #20
Episode 3: Chaos Theory Optional Photos
Here’s a picture showing all the extra photo locations in Episode 3. Click to enlarge:
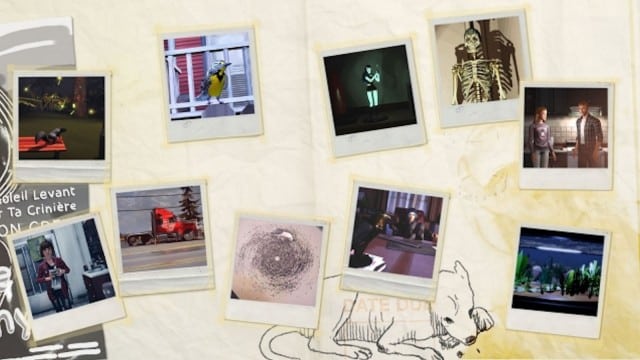
All 10 Life is Strange “Episode 3: Chaos Theory” Optional Photos get found in this video guide with detailed location tips.
Timeline in minutes for the Optional Photos Locations Guide:
• [0:15] – Optional Photo #21
• [1:06] – Optional Photo #22
• [1:52] – Optional Photo #23
• [2:34] – Optional Photo #24
• [2:55] – Optional Photo #25
• [3:21] – Optional Photo #26
• [3:55] – Optional Photo #27
• [5:16] – Optional Photo #28
• [6:10] – Optional Photo #29
• [6:42] – Optional Photo #30
Episode 4: Dark Room Optional Photos
Here’s a picture showing all the extra photo locations in Episode 4. Click to enlarge:
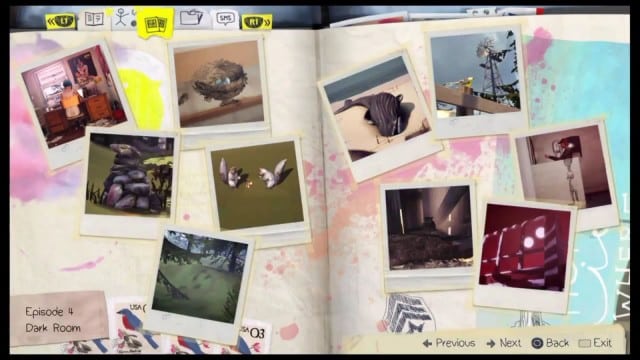
All 10 Life is Strange “Episode 4: Dark Room” Optional Photos get found in this video guide with detailed location tips.
Timeline in minutes for the Optional Photos Locations Guide:
• [0:15] – Optional Photo #31
• [0:46] – Optional Photo #32
• [1:29] – Optional Photo #33
• [2:07] – Optional Photo #34
• [3:32] – Optional Photo #35
• [4:04] – Optional Photo #36
• [4:36] – Optional Photo #37
• [5:02] – Optional Photo #38
• [6:21] – Optional Photo #39
• [7:07] – Optional Photo #40
Episode 5: Polarized Optional Photos
Here’s a picture showing all the extra photo locations in Episode 5. Click to enlarge:
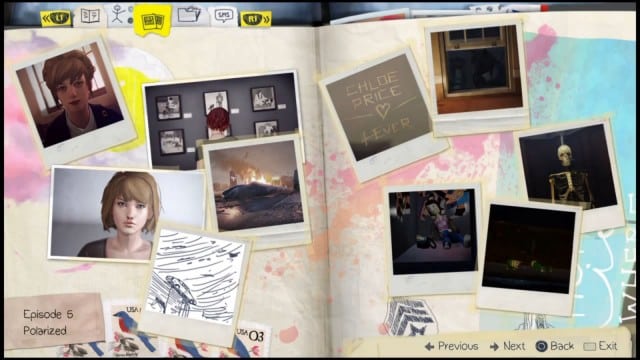
All 10 Life is Strange “Episode 5: Polarized” Optional Photos get found in this video guide with detailed location tips.
Timeline in minutes for the Optional Photos Locations Guide:
• [0:09] – Optional Photo #41
• [0:53] – Optional Photo #42
• [1:25] – Optional Photo #43
• [2:16] – Optional Photo #44
• [2:44] – Optional Photo #45
• [3:16] – Optional Photo #46
• [3:52] – Optional Photo #47
• [4:27] – Optional Photo #48
• [5:09] – Optional Photo #49
• [6:14] – Optional Photo #50
There you go! All Optional Photos in Life is Strange are yours in a snap! 😉
Huge thanks to Maka for the guide videos and tips.
Please comment if you have any additional Life is Strange Optional Photos location tips of your own, we’ll give you credit for it. – Thanks for visiting!

